Vietnamese
GETTING STARTED GUIDE
Chatting with customer is very simple task.
However, in order to chat with a professional style, you should consider the following elements
Chatting with customer is very simple task.
However, in order to chat with a professional style, you should consider the following elements
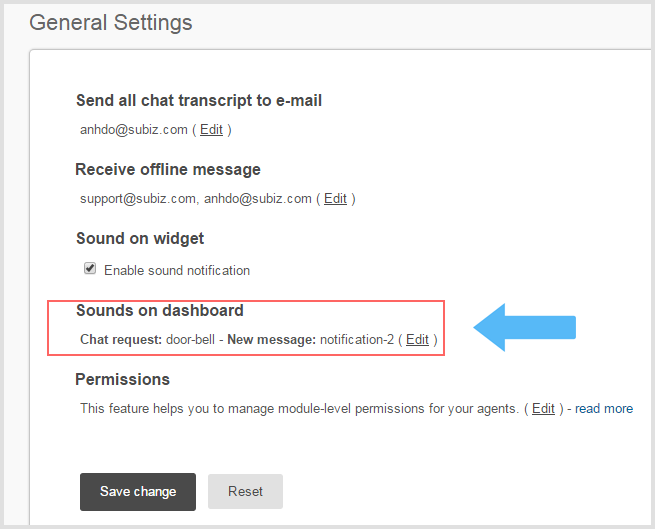
1. Login Dashboard > Setting > General setting
2. Go to Sounds on dashboard > Edit
3. Choose an option in the sound list of Chat request and New message.
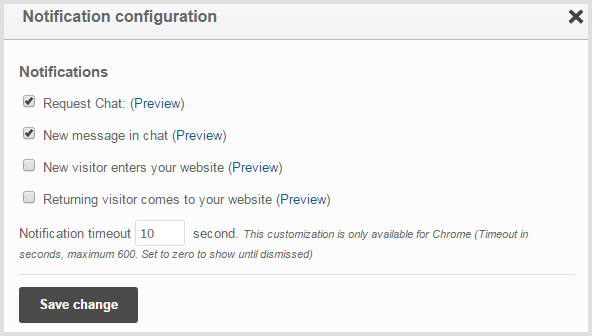
1. Enable Desktop notification (The warning message on top of the Dashboard page)
2. On Dashboard > click on the green circle on the top right of your display
3. Choose Notification
4. Enable display notification on Request chat and New message in chat
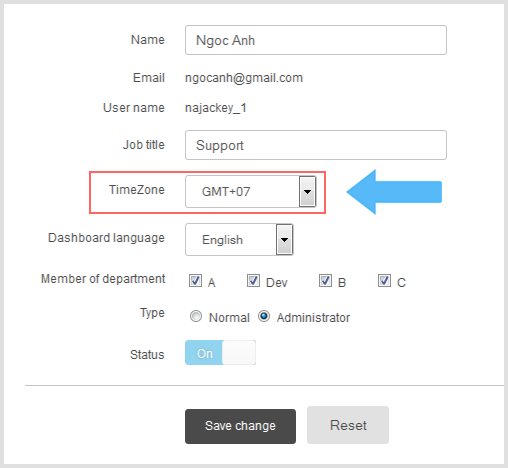
There have been many feedbacks regarding the different between chatting time and time on agent’s device. Follow these step to change chatting time:
1. Go to Agent > choose Edit
2. Find timezone setting
3. Choose your timezone option > Save change
4. Re-login Dashboard
In order to help agent to chat more effectively, Subiz created some command text as follow:
For example: !name Mr Jamie
For example: when you want to transfer chat to an agent named support1, you can type on chat window:!transfer @support1
Trigger provides automatic action based on predefined conditions. If you want the chat window opens automatically when a visitor access your website, you can set the trigger as follow:
1. Login Dashboard > Setting
2. Go to Trigger > Besides What is Trigger? click into Trigger library
3. Choose Invite after 10 seconds > Click Use this Trigger
4. Enable status > Save change
10 is waiting time for invitation to be sent, which means after visitor accesses the webpage 10 seconds, the invitation will be sent. If you change this number to 2 or 3, the chat window will open earlier.
Read more about Trigger in the following links.
Trigger Parameters
Common triggers
Trigger runs once per visit. Therefore, if you are browsing the website and want to test a new trigger, you should exit the website, and re-access after over 30 seconds. After 30 minutes from previous invitation, if visitor is still staying on your website, trigger will send the invitation again.
Use personalized automatic chat invitation Chat window are often opened automatically with a greeting. However, not many website can gain more customer interactions with this invitation. The most crucial issue is the way you approach visitor. It is not necessary to have a very formal greeting. It should be simple, friendly, which makes visitors feel like they are invited manually, but not by an automatic system. You can use Trigger to find out a visitor is new visitor or returned visitor, by which you can push a suitable greeting. This message makes your visitor feel that they are regarded and appreciated.
Note:
Agents should use their real name and their own image in avatar.
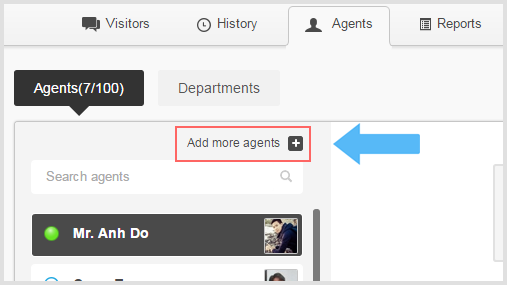
After registration, you will have admin account. From Dashboard, you can create more agents and allow your customer service team to use these agents to support visitors.
Structure of assigning chat to agents
Currently, it is based on equal structure. When there is a new chat request, all agents will receive this request and the first agent who join this conversation will continue to chat, the others could not join. Admin can decide whether one agent can or can not see conversation of others.
Assign agent
There are 2 types of agent: admin and normal.
Admin agent can change setting, assign, and manage normal agent.
Note: When you create a new agent, you should consider the following elements:
Transfer chat between agents:
Agent can transfer a chat to each other by:
![]()
Canned responses and shortcuts helps agent to chat faster when there are huge number of conversations at the same time. You should identify the questions and answers that occur regularly during chatting time. Then, these responses should be saved with shortcuts so you can use the shortcut to respond faster.
How to create canned responses and shortcut
Note
In order to change content and text appearing on online and offline chat window, you can modify as follow:
1. Login Dashboard
2. Go to Setting> Chat window> Language
3. You can choose auto detected language or your prefered language; then you can modify text on chat window (Button chat online, offline, instruction....)
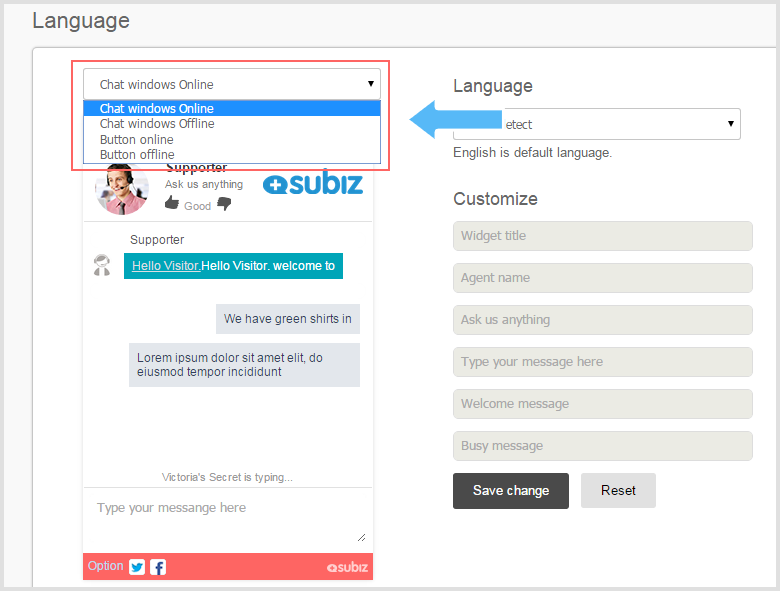
Title when agent are online and offline
You can change title by choosing an option above the simulate chat window
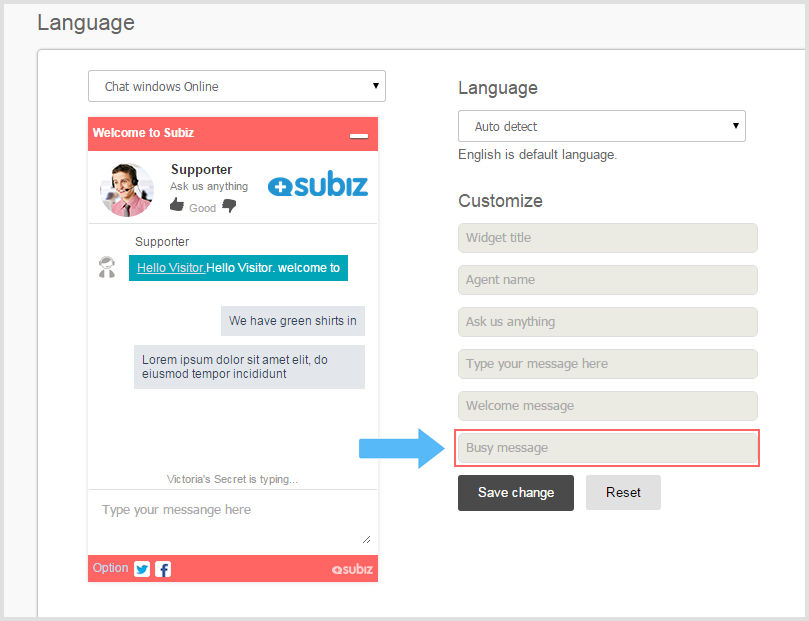
Busy message
If agent do not respond after 30 seconds of request chat, system will automatically announce that agents are busy. If you are busy but you forgot to logout Dashboard or change status to ‘away’, this message will help to reduce the unsatisfactoriness of visitor.
To modify this message:
1. Login Dashboard
2. Go to Setting > Chat widget > Language
3. In Busy message box, use default text of Subiz or type your prefered message.